
The Power of At-Home Recording Studios
In today’s world, more musicians than ever are making great music at home. You do not need a fancy studio or expensive gear to start recording your songs. The power to produce high-quality music is available to anyone with a computer and some basic gear.
Learning the basics of home recording is no longer just a hobby. It is an essential skill for any serious musician. This guide will walk you through the basics and beyond, giving you simple, practical advice to help you make the most of your at-home recording journey.
Setting Up Your In-Home Studio for Recording
Your first step to better recordings is choosing where you will work. Most people use their bedroom or another quiet room. If possible, pick a space with a door you can close. Try to avoid rooms with lots of windows or hard surfaces, because these can cause echo or outside noise. Once you have your spot, you will need some basic equipment.
How to Soundproof Your Studio and Enhance Recording Quality
It is important to know the difference between soundproofing and acoustic treatment. Soundproofing a room is about blocking sound from leaving or entering. This keeps your music from bothering your neighbors and prevents outside noise from ruining your recordings. Acoustic treatment, like sound absorbing wall panels, makes the sound inside your room clearer and cleaner..

Blog Post
"*" indicates required fields
By submitting this form, I authorize Musicians Institute (MI) to make or allow the placement of calls, emails, and texts to me at the phone number that I have provided, including through the use of automated technology, or a prerecorded or artificial voice. I understand that I am not required to provide my phone number as a condition of purchasing any property, goods, or services. I agree to the terms of MI’s Privacy Policy. MI will not sell or rent your information to third parties, and you may unsubscribe at any time.
Soundproofing a Room on a Budget
Thick curtains, carpets, and rugs can help block sound. You can also place towels or blankets around the doors to fill any gaps. Weatherstripping can help seal cracks around doors and windows. Make sure you are not blocking air flow or creating a space that gets too hot. Sometimes, just moving your recording spot away from windows or shared walls can make a big difference. Remember, you do not have to make your room totally silent. You just want to control noise as much as possible for better recordings.
Room Acoustics: Making Your Space Sound Great
Acoustic treatment is not the same as soundproofing. When you treat a room for acoustics, you are trying to make your recordings sound clear and natural. Hard, flat surfaces bounce sound around, creating echoes. You can fix this by hanging up blankets or putting a bookshelf with books in your space. These soft and uneven surfaces help absorb and scatter sound.
How to Make Acoustic Wall Panels
Some people make DIY acoustic panels by wrapping foam or insulation in fabric and hanging them on the wall. Pay special attention to the corners of your room, where sound tends to build up. You can test your room by clapping your hands and listening for echoes or ringing sounds. Moving your speakers or microphone away from the walls and corners will also help. A few small changes can make a big difference in your recordings.
Essential Studio Recording Equipment and Tips for Success
The heart of your studio is an audio interface. This device connects your microphones and instruments to your computer. You will also need one good microphone. A large diaphragm condenser microphone is versatile for vocals and acoustic instruments. A pair of closed-back headphones is crucial for listening while you record and for mixing. Of course, you need a computer that can run your recording software smoothly. Do not forget the cables you need to connect everything together.
Dynamic Microphones vs. Condenser Microphones
There are two main types of microphones you will see: dynamic and condenser. Condenser microphones are great for capturing detail in vocals and acoustic instruments, but they are more sensitive to background noise. Dynamic microphones are tough and handle loud sounds well, making them a good choice for drums and guitar amps. Place your microphone at the right distance from your sound source. Too close, and your recording might sound boomy or distorted. Too far, and it may pick up too much room noise.
Intro to DAWs (Digital Audio Workstations)
A DAW is a software program where you record, edit, and mix your music. Some of the most popular DAWs are Ableton Live, Logic Pro, FL Studio, Vital, and GarageBand. Each one looks a little different, but they all do similar things. If you are not sure which to choose, try out a few demos or look for a DAW that matches your style of music.
Once you have your DAW, learn the basics like how to record a track, cut and move audio, and export your finished song. Watch beginner tutorials online to see how others use your DAW. As you become more familiar with your software, you will discover new tools and shortcuts to speed up your workflow.
Recording Tips:
Always check your recording levels. If the sound is too loud, it will distort. If it is too quiet, you might hear more noise. Use a pop filter when recording vocals to avoid harsh “P” and “B” sounds. When tracking instruments, you can use direct input (DI) for guitars and bass, or use a mic to capture the sound of the amp or instrument. Recording with a metronome or click track helps you keep your timing tight, making editing and mixing much easier later on.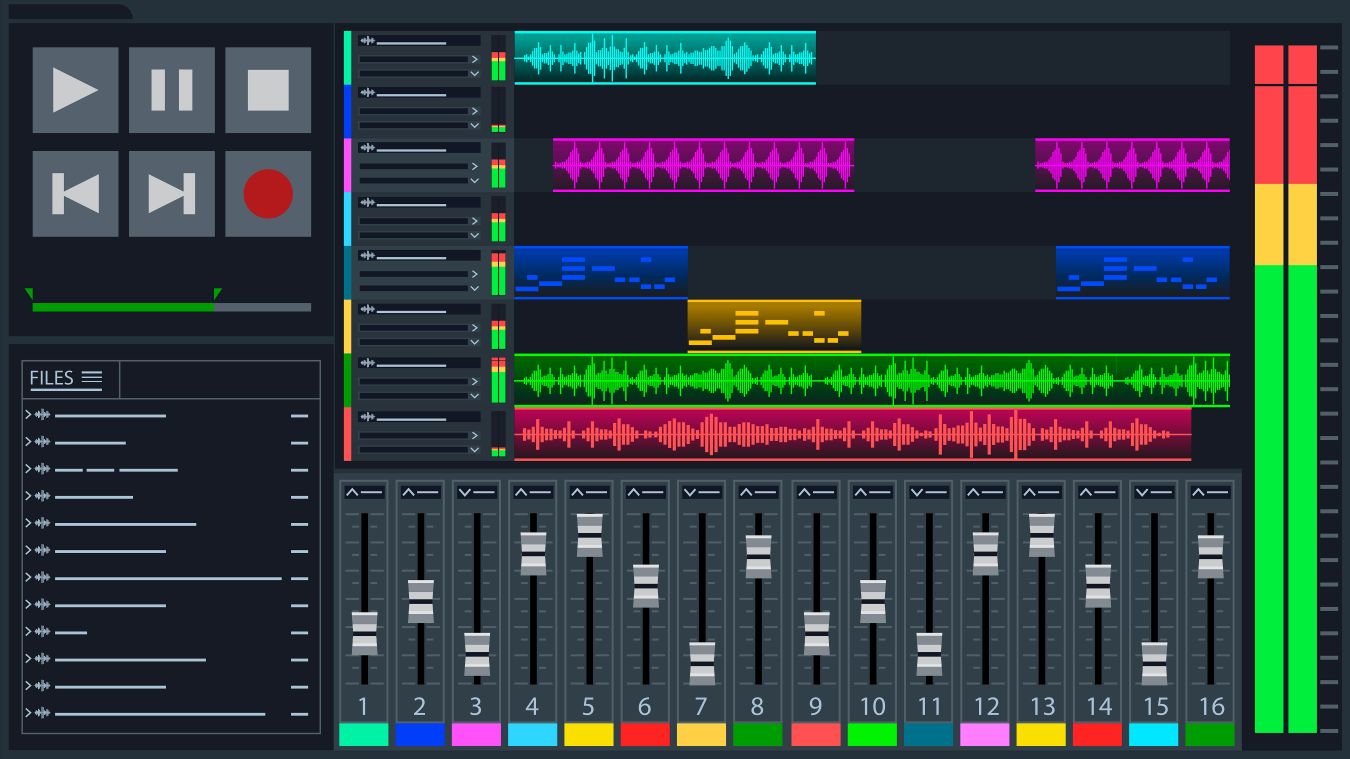
Types of EQs and Filters: Sculpting Your Sound
EQ, or equalization, lets you shape the tone of your tracks by boosting or cutting certain frequencies. This is one of the most important tools for making your mix sound professional. There are different types of EQs.
- Parametric EQs give you full control over which frequencies you want to change.
- Graphic EQs let you make broad changes over a range of bands.
- Shelving EQs boost or cut all frequencies above or below a certain point.
- Filters, like high-pass and low-pass filters, let you cut out unwanted low or high frequencies.
Use EQ to remove muddiness from your mix, brighten up vocals, or clean up your bass. Start with small changes, and listen closely to how your track sounds. With practice, you will learn which frequencies to adjust for each instrument or voice.
Compression, Reverb, and Tips for Other Recording Effects
- Compression: Compression makes your recordings sound smooth and balanced. It controls the difference between the loudest and quietest parts of your sound. A little compression on vocals or instruments can make them sit better in the mix. Too much compression can make your track sound flat, so use it with care.
- Reverb: Reverb adds a sense of space and depth. Use it to make your vocals sound like they were recorded in a larger room, or to add character to instruments.
- Best Practice for Adding Effects: Delay, chorus, and other effects can also add interest, but it is easy to overdo it. Try to use effects to highlight the best parts of your song, not to cover up mistakes. Listen to your favorite music and notice how effects are used. This will help you make better choices in your own mixes.
Editing Tips for Home Recordings: Sound Like a Pro
Editing is where you polish your recordings. This involves cutting out silence and mistakes between phrases. Start by listening through your tracks and cutting out any unwanted noises or mistakes. Most DAWs let you split, trim, and move parts of your audio easily. If you record multiple takes, you can choose the best parts from each and combine them. This is called comping. Clean up your audio by removing long silences or background noise using noise gates or special repair tools. Arrange your tracks so they build energy and keep the listener interested. Use panning to place different sounds across the stereo field, giving your mix more space and clarity.
Always save your work often and keep backup copies of your sessions. This will save you time and stress if something goes wrong.
How to Mix and Export an Audio Recording in 6 Steps
- Mixing is the process of blending your tracks into a finished song.
- Start by setting the volume levels so every instrument and vocal can be heard clearly. Get the balance between the drums, bass, vocals, and instruments sounding good.
- Use panning and EQ to give each part its own place in the mix.
- Apply compression to smooth out any uneven spots.
- Listen to your mix on different headphones and speakers to make sure it sounds good everywhere.
- When you are happy with your mix, export it as a high-quality file, like a WAV or high-bitrate MP3.
Pro Tip: Make sure to name and tag your tracks properly, especially if you plan to share them or use them in college applications.
Where to Find Free Recording Software, Tutorials, and Editing Tools
You do not have to spend a lot of money to make music at home. There are many free and budget-friendly tools available for new musicians. Many DAWs offer free trial versions, and some, like GarageBand, are completely free for Mac users. There are also free plugins for EQ, compression, reverb, and more. You can find free sample packs, loops, and sound effects online to use in your music.
YouTube is a great place to learn about recording, mixing, and music production, with thousands of tutorials for every skill level. Online forums and music communities are helpful for getting advice and feedback on your tracks. Take advantage of these resources to keep learning and growing as a musician.
Common Mistakes Beginners Make (and How to Avoid Them)
Every beginner makes mistakes. Some common problems are recording at levels that are too high or too low, using too many effects, or ignoring room treatment. Another mistake is not saving backup copies of your work. Some people get stuck trying to make everything perfect and never finish a song. The best way to learn is to keep practicing and not be afraid to make changes. Focus on the basics, keep your sessions organized, and remember that each project helps you get better.
Importance of Music Theory for Producers and Musicians
You do not have to be a theory expert to make good music, but knowing the basics can really help. Understanding scales, chords, and rhythm gives you more control over your songwriting and production. Even if you work mostly in a DAW (Digital Audio Workstation), music theory helps you build interesting chord progressions and catchy melodies.
Start by learning simple scales and how to build a major or minor chord. Practice tapping out simple rhythms and matching them with drum patterns. As you get more comfortable, you can experiment with new chords or try writing in different keys. These skills will help you arrange and edit your music more confidently, whether you are writing a pop song or producing a beat.
How Music College Builds Skills for a Career in Production
While you can learn a lot on your own, a music college like Musicians Institute provides a structured path to a career. Students get hands-on training with professional equipment and learn from experienced teachers who have worked in the field. A music degree shows future employers that you understand advanced recording, editing, and production skills.
Music college emphasizes networking with peers, teachers, and visiting industry professionals. These connections can lead to future jobs and collaborations. Career services departments help with job placement, internships, and mentorship. Most importantly, you will gain the confidence to take on new challenges and adapt to changes in the industry.
Studio Recording Program vs. Audio Engineering Program
Musicians Institute in Los Angeles helps students build the necessary foundation and professional network to excel in the music industry. We offer both a Studio Recording program and an Audio Engineering program.
The Studio Recording Program is perfect if you want to learn about producing, songwriting, and artist development. You will study how to arrange music, develop your own sound, and work on real recording projects.
The Audio Engineering Program is more focused on the technical side. You will learn about mixing, mastering, live sound, and the gear used in studios and on stage.
Both programs give you hands-on time in professional studios and let you work with real artists and clients. Many students who complete these programs go on to become producers, engineers, mixers, or work in live sound. No matter which program you choose, you will learn the skills you need to succeed in the music industry.
Get Started with Musicians Institute in Los Angeles
Musicians Institute is right in the heart of Hollywood, putting you close to everything the music industry has to offer. Getting started is easy. You can apply online, schedule a campus tour, or attend an open house to learn more about the programs. Musicians Institute offers financial aid and scholarships for students who qualify, making it possible for more people to follow their dreams.
If you are ready to take the next step, contact our admissions team to get started.
Your future in music is waiting.